
How to give
a Glass effect to text? Here we tried to show you in simple steps.
Lets get
started…
STEP-1
Let’s start
by creating a new document. Set the dimensions of the canvas to 900×1200 px.

STEP-2 (Creating gradient background)
Double click on the Background layer to access Layer
Style and add Gradient Overlay as I shown

Arrange
colors in gradient Editor as shown and click OK

Background
will look like this after adding Gradient Overlay

STEP-3 (Adding cloudy texture)
Create a new layer and set the background color BLACK
and foreground color WHITE in the bottom of tool palate, then go to Filter
> Render > Clouds. Change the blend mode to Overlay and reduce
opacity to 50%.

STEP-4 (Creating glassy effect)
Create a new layer and Type your text with Horizontal
Type Tool (T). I have chosen font Cooper Std. Size 225 pt.

Double
click on the text layer to access Layer Style
and make changes as shown

Then
add inner shadow as shown below

Next
add Outer Glow
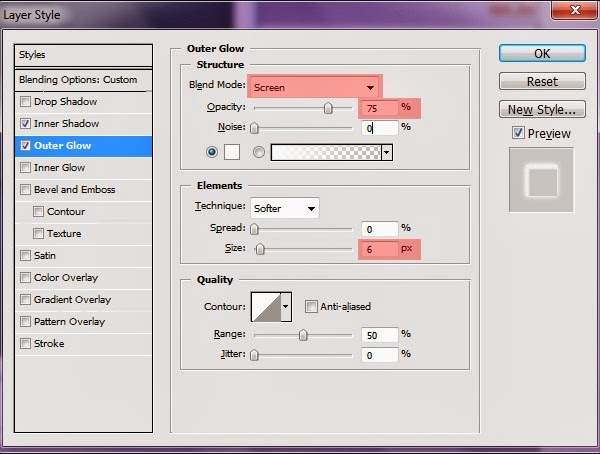
Next
add Bevel and Emboss

Next
add Gradient Overlay

Then
add Stroke

After
adding all above styles the effect will look like this.

STEP-5
(Arranging text)
Duplicate the text layer and place it in such a way
one overlays the other to witness the glassy effect

Now
add your own text, I go with “ABDUL”

STEP-6
(Create shadow)
Create a new layer, draw oval shape and go to Select > Modify > Feather
(Alt +Ctrl + D) give feather radius 10 pix then fill it with BLACK color and keep this layer
below the text layers.

STEP-7
(Creating mirror
effect)
Duplicate all the text layers and merge them. Then
with transform selection (Ctrl +T) flip vertically and place it below the
original text as I shown.

Erase
slightly at the bottom part using Eraser Tool (E)
and reduce the opacity of the layer to 50%


How to give a Glass effect to text